Science examples
"testing materials and designs" (Gr. 3)
During the testing materials and design unit, I focused mainly on the structures of bridges, but also had a bit of a focus on towers as well. As a class we often built small structures, tested them, and then brainstormed ways that we could make them stronger next time. By the end of the unit, students had to use their new knowledge to design a bridge that could hold up all 3 of the "Billy Goats Gruff" so that they could escape from the troll! I put a LOT of effort into this unit, including a very in-depth notebook file which you can find below. However, instead of regurgitating some of the neat things that I did for that unit on this page, I am going to suggest that you check out my BUILDING STRUCTURES website that I made for this unit instead! I used the content from the science unit to create this website for a project in a Web-Based Learning class that I took the following semester. The website was designed to be used as a classroom resource for both teachers and students. It is complete with descriptive information, vocabulary, breakdown of the final bridge building project, teacher resources and lesson plans, and fun student links! Check it out by clicking on the red button below! I have also included a video (with faces covered) that I made to exemplify the final bridge building projects!
Building Devices that Move (Gr.4/5)
Student-Based Learning: Activity Centers to explore how different devices move and what force is causing them to move
|
Station 1: Compare 2 waterwheels for effectivenes
|
Station 2: Anatomy of a Ski Lift: Observe, then build a bigger scale version.
|
Station 3: Windmills
|
Station 4: Flagpole - before and after a pulley wheel
|
Station 5: A Crane with a Crank
|
|
Devices that move: Angry Birds Catapults (energy storing components)
Build and compare the effectiveness of 2 different Angry Birds catapults, and justify which one you would choose to use in the video game and why. |
Devices that Move Final Project: Build a controlled car with brakes
|
Life cycles (Gr. 3)
After the testing materials and designs unit, I also got to teach the life cycles units on amphibians, as well as start the insects life cycles unit.
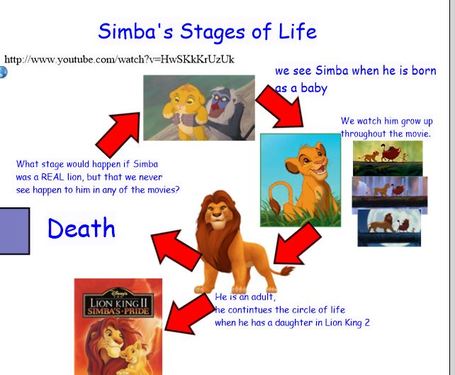
I introduced the lifecycles unit by reading to the class about life cycles stages from a few different picture books. Then we watched part of a Bill Nye Video about life cycles to fill out the 4 main stages of any animal's life cycle. To reinforce the stages in a way that the students might remember, I showed them a movie clip from "The Lion King" that talked about the 'circle of life' and then showed the 4 stages of life in regards to Simba's life (KSA 13).
I introduced the lifecycles unit by reading to the class about life cycles stages from a few different picture books. Then we watched part of a Bill Nye Video about life cycles to fill out the 4 main stages of any animal's life cycle. To reinforce the stages in a way that the students might remember, I showed them a movie clip from "The Lion King" that talked about the 'circle of life' and then showed the 4 stages of life in regards to Simba's life (KSA 13).
|
|
|
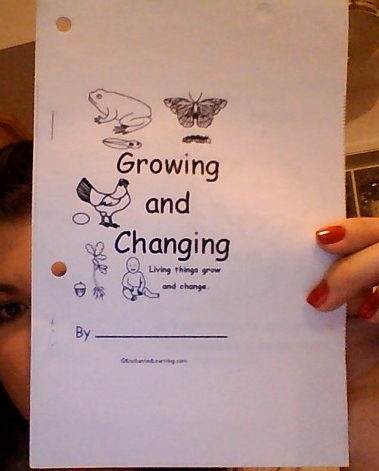
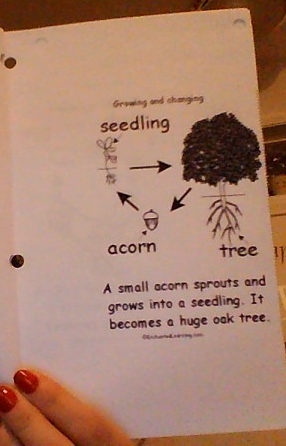
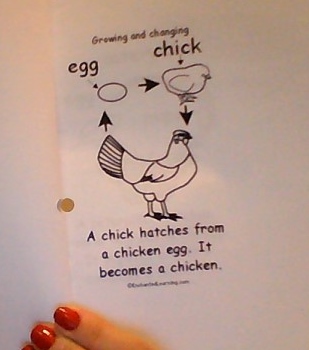
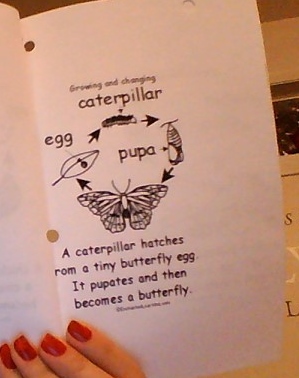
Then I had students each cut, staple, and color the "Growing and Changing" life cycles booklet. Once kids had their booklets assembled, they broke off into pairs to read through their book together. When they were done reading through the book we came back together as a big class and attempted to ACT out each life cycle in the book as well (KSA 9). The kids had a great time trying to flop around like a tadpole, clucking like chickens, and flying like butterflies! Below are a few pages from the booklet that we looked at and acted out!
Once students understood the 4 stages of all life cycles, I quickly introduced them to all of the 6 different animal groups that they would be studying during their life cycles unit.
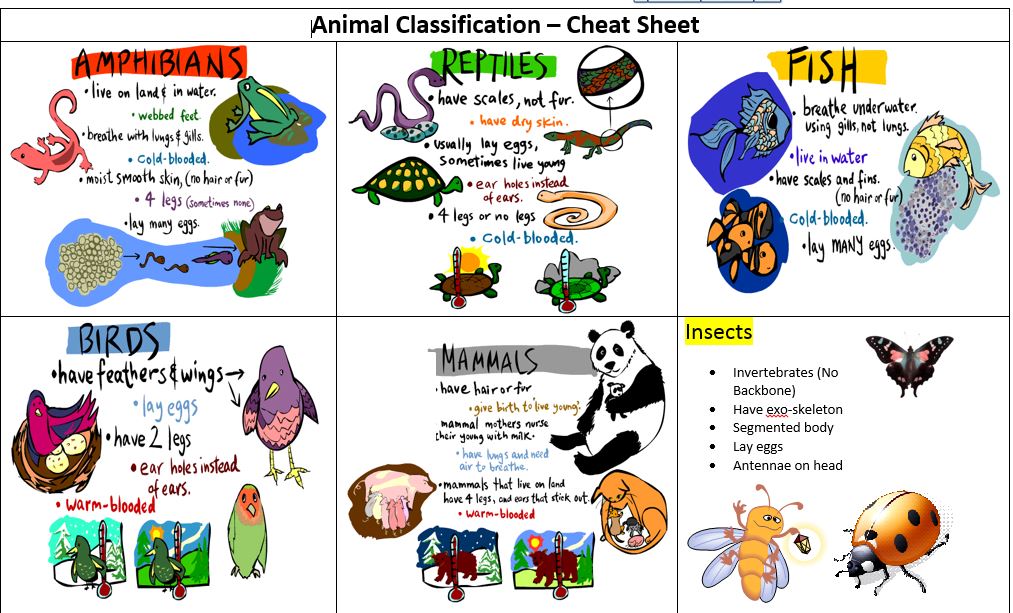
We discussed how diverse kinds of animals are similar or different, and how to tell them apart from one another by their characteristics (such as warm blooded, dry scales, feathers, etc). I gave them the "classification cheat sheet" to help them keep everything separate. We played a classification sorting game on the Smartboard and the kids loved how interactive it was! Then I gave them a classification cut and paste sheet that I created, and they had to glue the different animals into their right classification!
We discussed how diverse kinds of animals are similar or different, and how to tell them apart from one another by their characteristics (such as warm blooded, dry scales, feathers, etc). I gave them the "classification cheat sheet" to help them keep everything separate. We played a classification sorting game on the Smartboard and the kids loved how interactive it was! Then I gave them a classification cut and paste sheet that I created, and they had to glue the different animals into their right classification!
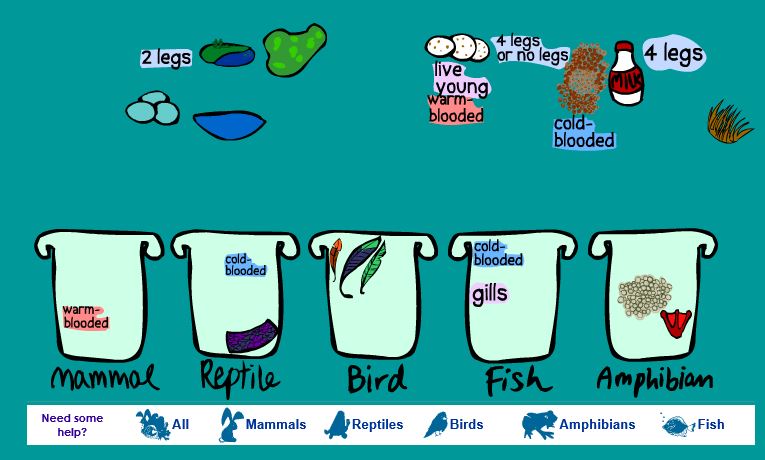

AMPHIBIAN LIFE CYCLES
The first type of life cycle that I taught was the life cycles of amphibians, with a focus on frogs. We watched many videos, went through a very visual Smartboard presentation of their life cycles, ways that frogs compare to other amphibians, and labelled the parts of a frog. After learning about frogs and their relatives, their diet, etc, I decided to integrate some Language Arts into the science unit to help practice some of the "quotation marks" that we had been learning earlier that day in LA. I made up a story of some frogs and salamanders that were talking about their similarities, and every time there was a quote, the kids had to stand up and read the quote to show that someone was speaking. It was a great way to get them up and kinaesthetically moving during a science lecture! To really drive home the life cycles, I decided to integrate some kinesthetic 'touching' into the life cycle unit by modelling little tadpoles and froglets out of plastercine so that the kids could physically hold the 'frogs' in their different stages. I even soaked some water beads over night to bring in as fake goopy eggs! The kids really loved being able to touch the fake frogs! I also had them create little fold-up life cycle booklets that were in the shape of a frog so that they could have a booklet to study from when it came time for a test. Once again, I decided to integrate a bit of LA into the lesson by making them write the stages in script writing because it was an area that they struggled with earlier on in the week. The booklets turned out really cute! The gallery below showcases many of the things that I mentioned in this paragraph as well, and their explanations are listed below the picture. Also, click on the red button to check out my Notebook slide on amphibian life cycles!
The first type of life cycle that I taught was the life cycles of amphibians, with a focus on frogs. We watched many videos, went through a very visual Smartboard presentation of their life cycles, ways that frogs compare to other amphibians, and labelled the parts of a frog. After learning about frogs and their relatives, their diet, etc, I decided to integrate some Language Arts into the science unit to help practice some of the "quotation marks" that we had been learning earlier that day in LA. I made up a story of some frogs and salamanders that were talking about their similarities, and every time there was a quote, the kids had to stand up and read the quote to show that someone was speaking. It was a great way to get them up and kinaesthetically moving during a science lecture! To really drive home the life cycles, I decided to integrate some kinesthetic 'touching' into the life cycle unit by modelling little tadpoles and froglets out of plastercine so that the kids could physically hold the 'frogs' in their different stages. I even soaked some water beads over night to bring in as fake goopy eggs! The kids really loved being able to touch the fake frogs! I also had them create little fold-up life cycle booklets that were in the shape of a frog so that they could have a booklet to study from when it came time for a test. Once again, I decided to integrate a bit of LA into the lesson by making them write the stages in script writing because it was an area that they struggled with earlier on in the week. The booklets turned out really cute! The gallery below showcases many of the things that I mentioned in this paragraph as well, and their explanations are listed below the picture. Also, click on the red button to check out my Notebook slide on amphibian life cycles!
INSECT LIFE CYCLES
After we had studied amphibian life cycles I moved on to teaching the students about insect life cycles. I introduced the topic with a Bill Nye video about insects because the students love him so much! From the video we learned all about insect diets, their requirements such as 6 legs, how many bugs have an exoskeleton, how bugs either disguise themselves or have bright poisonous markings, how their body has 3 different parts called the head, the thorax, and the abdomen, and how some insects are helpful while others are pests. We played some interactive Smartboard games as a class to help us classify our bugs as true insects or not based on the criteria we had learned. One day I brought in a brown paper bag that said "mystery bugs" and was filled with fake insects inside. Students had to observe their bug and decide whether it was a true insect or not, and then fill out a worksheet and do a drawing to document this mystery bug. We also did another activity where students had the chance to design their OWN mystery insect,, it just had to follow the requirements for a true bug. I think that it was a great way to get the kids excited about learning about bugs! Once the kids had the guidelines straight for bug classification, I moved on to show them the stages of a butterfly's life cycle and how they change through metamorphosis. We did a craft using a plate and noodles to create a life cycle of a butterfly's 4 stages and the kids had a lot of fun with it! We used the craft as a starting point to compare butterfly life cycles to other insects life cycles that have the same stages. I had went out and bought mealworms so that we could track a real living life cycle for the next few weeks. I began by reading the kids a book about a mealworms life cycle so that they could know what to expect as we observed our mealworms grow. Next I explained the ideal environment for our mealworms, and we set up the mealworms' appropriate habitat. I made little booklets for the kids so that we could quickly write down observations each time that we studied the mealworms again. We began by counting all of the alive mealworms and all of the dead mealworms and documenting that they were all at their larvae stage in the lifecycle. Within a week we had a few mealworms in their pupa stage and the kids were amazed! As we waited for the mealworms to grow we continued to explore insects further by learning about insects that are pests, insects that are helpful, and how insects effect humans. We also learned about how some bugs have special markings to either help them be camouflaged or to give a warning that they are poisonous to their predators. Below are some photos of the things that I have discussed in this paragraph, and you can find the notebook link below!
After we had studied amphibian life cycles I moved on to teaching the students about insect life cycles. I introduced the topic with a Bill Nye video about insects because the students love him so much! From the video we learned all about insect diets, their requirements such as 6 legs, how many bugs have an exoskeleton, how bugs either disguise themselves or have bright poisonous markings, how their body has 3 different parts called the head, the thorax, and the abdomen, and how some insects are helpful while others are pests. We played some interactive Smartboard games as a class to help us classify our bugs as true insects or not based on the criteria we had learned. One day I brought in a brown paper bag that said "mystery bugs" and was filled with fake insects inside. Students had to observe their bug and decide whether it was a true insect or not, and then fill out a worksheet and do a drawing to document this mystery bug. We also did another activity where students had the chance to design their OWN mystery insect,, it just had to follow the requirements for a true bug. I think that it was a great way to get the kids excited about learning about bugs! Once the kids had the guidelines straight for bug classification, I moved on to show them the stages of a butterfly's life cycle and how they change through metamorphosis. We did a craft using a plate and noodles to create a life cycle of a butterfly's 4 stages and the kids had a lot of fun with it! We used the craft as a starting point to compare butterfly life cycles to other insects life cycles that have the same stages. I had went out and bought mealworms so that we could track a real living life cycle for the next few weeks. I began by reading the kids a book about a mealworms life cycle so that they could know what to expect as we observed our mealworms grow. Next I explained the ideal environment for our mealworms, and we set up the mealworms' appropriate habitat. I made little booklets for the kids so that we could quickly write down observations each time that we studied the mealworms again. We began by counting all of the alive mealworms and all of the dead mealworms and documenting that they were all at their larvae stage in the lifecycle. Within a week we had a few mealworms in their pupa stage and the kids were amazed! As we waited for the mealworms to grow we continued to explore insects further by learning about insects that are pests, insects that are helpful, and how insects effect humans. We also learned about how some bugs have special markings to either help them be camouflaged or to give a warning that they are poisonous to their predators. Below are some photos of the things that I have discussed in this paragraph, and you can find the notebook link below!
LIFE CYCLE ASSESSMENT (KSA 11)
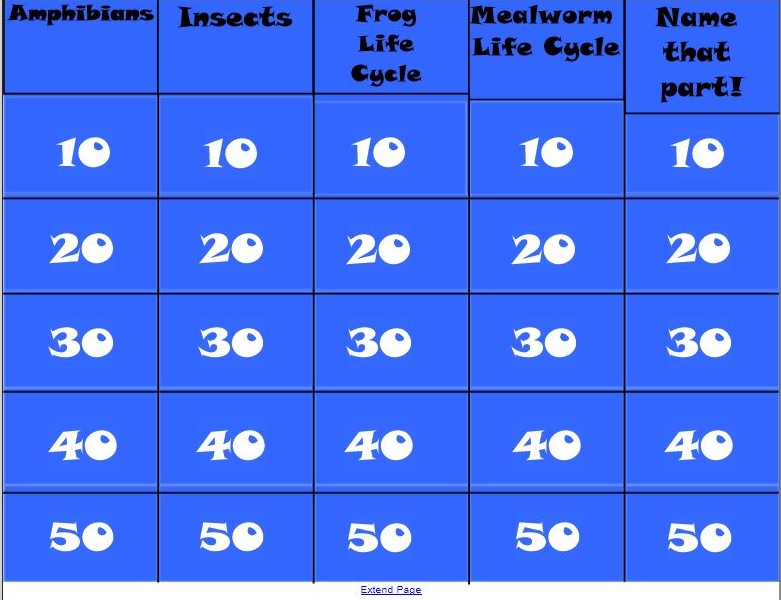
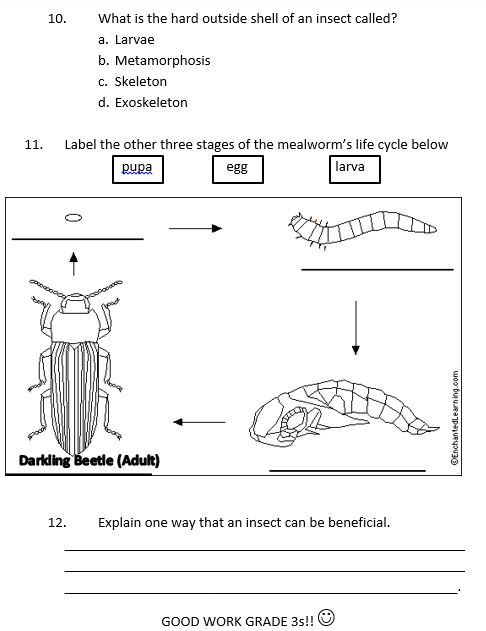
I wrapped up these 2 life cycle units just before leaving my PS2, which meant that I needed some way to have a summative assessment of the student learning during those topics. I created a test about life cycles, amphibians, and insects in my last week of practicum. I made the students a very general study guide, and the day before our test I did a fun review day by playing jeopardy in 2 teams. The kids had a blast playing the jeopardy and I was very impressed with how well they did! Below is the link to my jeopardy game, as well as a sample of the unit test that I had administered.
I wrapped up these 2 life cycle units just before leaving my PS2, which meant that I needed some way to have a summative assessment of the student learning during those topics. I created a test about life cycles, amphibians, and insects in my last week of practicum. I made the students a very general study guide, and the day before our test I did a fun review day by playing jeopardy in 2 teams. The kids had a blast playing the jeopardy and I was very impressed with how well they did! Below is the link to my jeopardy game, as well as a sample of the unit test that I had administered.